This blog contains affiliate links. Please see my disclosure policy for more information.


Showing posts with label Flower. Show all posts

Monday, 3 December 2012

Easy Crossed DC Headband

Easy Crossed Double Crochet Headband


Bands: Top - Easy Crossed DC Headband, 
     Middle - Puff Stitch Headband, 
Bottom - Sayde Headband
Flowers - A Frothy Flower


Easy Crossed Double Crochet Headband

NOTE: My patterns are free and I would like them to stay that way. You are free to print them out and pass them around but please make sure my blog address is somewhere on the pattern (http://knotyournanascrochet.blogspot.co.nz/) so that people know where the pattern originated. 

Please do not sell my patterns or say they are your own. You are free to do whatever you want with the finished item. If you are selling them online please link back the pattern and give me credit. I took the time to write this pattern out so the least you can do is take the small amount of time it takes to give me credit. 


Materials


4.5 mm hook

DK Yarn
needle (thread if sewing on elastic by hand)
scissors
Small button or elastic
Sewing machine optional. I used a sewing machine to stitch the elastic. I looped through the end stitches and then sewed the elastic to itself.


Foundation Single Crochet


Row 1:  Foundation single crochet the length you would like in multiples of 2. If you are not adding elastic do 1 inch smaller than the head measurement. If you are using elastic I would go about 5 inches smaller than the head measurement. For example the head measurement I was making is 19 inches. You will want to make it an inch smaller than this so 18 inches. My crochet band measured 14 inches STRETCHED. So we will want to cut 4.5 inches for the elastic.  So the end headband with elastic will be about a inch smaller than the head measurement to allow for stretch. I have been told that crochet headbands can stretch quite a bit with use so hopefully making it a little smaller will help this problem.

Crossed DC

Row 2: Chain 2, turn. *Skip 2, dc in the next stitch, dc in the 2nd skipped stitch, ch 1* repeat. Dc in last stitch.

Row 3: Ch 1, turn. Sc across. Finish off and weave in ends.

Add a button if that is your joining preference or sew the elastic to each end to give it some stretch. I used a sewing machine to stitch my ends down because I think it will make it last a lot longer.


Saturday, 1 December 2012

Easy Puff Stitch Headband

Easy Puff Stitch Crochet Headband

     Middle - Puff Stitch Headband, 
Bottom - Sayde Headband
Flowers - A Frothy Flower

Easy Puff Stitch Crochet Headband

I ended up liking the back off the puff stitch better so went with that side instead of the puffy side. Either will work.


NOTE: My patterns are free and I would like them to stay that way. You are free to print them out and pass them around but please make sure my blog address is somewhere on the pattern (http://knotyournanascrochet.blogspot.co.nz/) so that people know where the pattern originated. 

Please do not sell my patterns or say they are your own. You are free to do whatever you want with the finished item. If you are selling them online please link back the pattern and give me credit. I took the time to write this pattern out so the least you can do is take the small amount of time it takes to give me credit. 


Materials


4.5 mm hook

DK Yarn
needle (thread if sewing on elastic by hand)
scissors
Small button or elastic
Sewing machine optional. I used a sewing machine to stitch the elastic. I looped through the end stitches and then sewed the elastic to itself.


Foundation Single Crochet


Row 1:  Foundation single crochet the length you would like in multiples of 2. If you are not adding elastic do 1 inch smaller than the head measurement. If you are using elastic I would go about 5 inches smaller than the head measurement. For example the head measurement I was making is 19 inches. You will want to make it an inch smaller than this so 18 inches. My crochet band measured 14 inches STRETCHED. So we will want to cut 4.5 inches for the elastic.  So the end headband with elastic will be about a inch smaller than the head measurement to allow for stretch. I have been told that crochet headbands can stretch quite a bit with use so hopefully making it a little smaller will help this problem.

Puff Stitch


Row 2: ch 2, skip 1. *Puff Stitch (PS) in next stitch, ch 1, skip the next stitch* Repeat until you have 2 stitches remaining. Dc in the last stitch, ch 1, turn.

Row 3: Sc across. Finish off and weave in ends.


Add a button if that is your joining preference or sew the elastic to each end to give it some stretch. I used a sewing machine to stitch my ends down because I think it will make it last a lot longer.
Tuesday, 18 September 2012

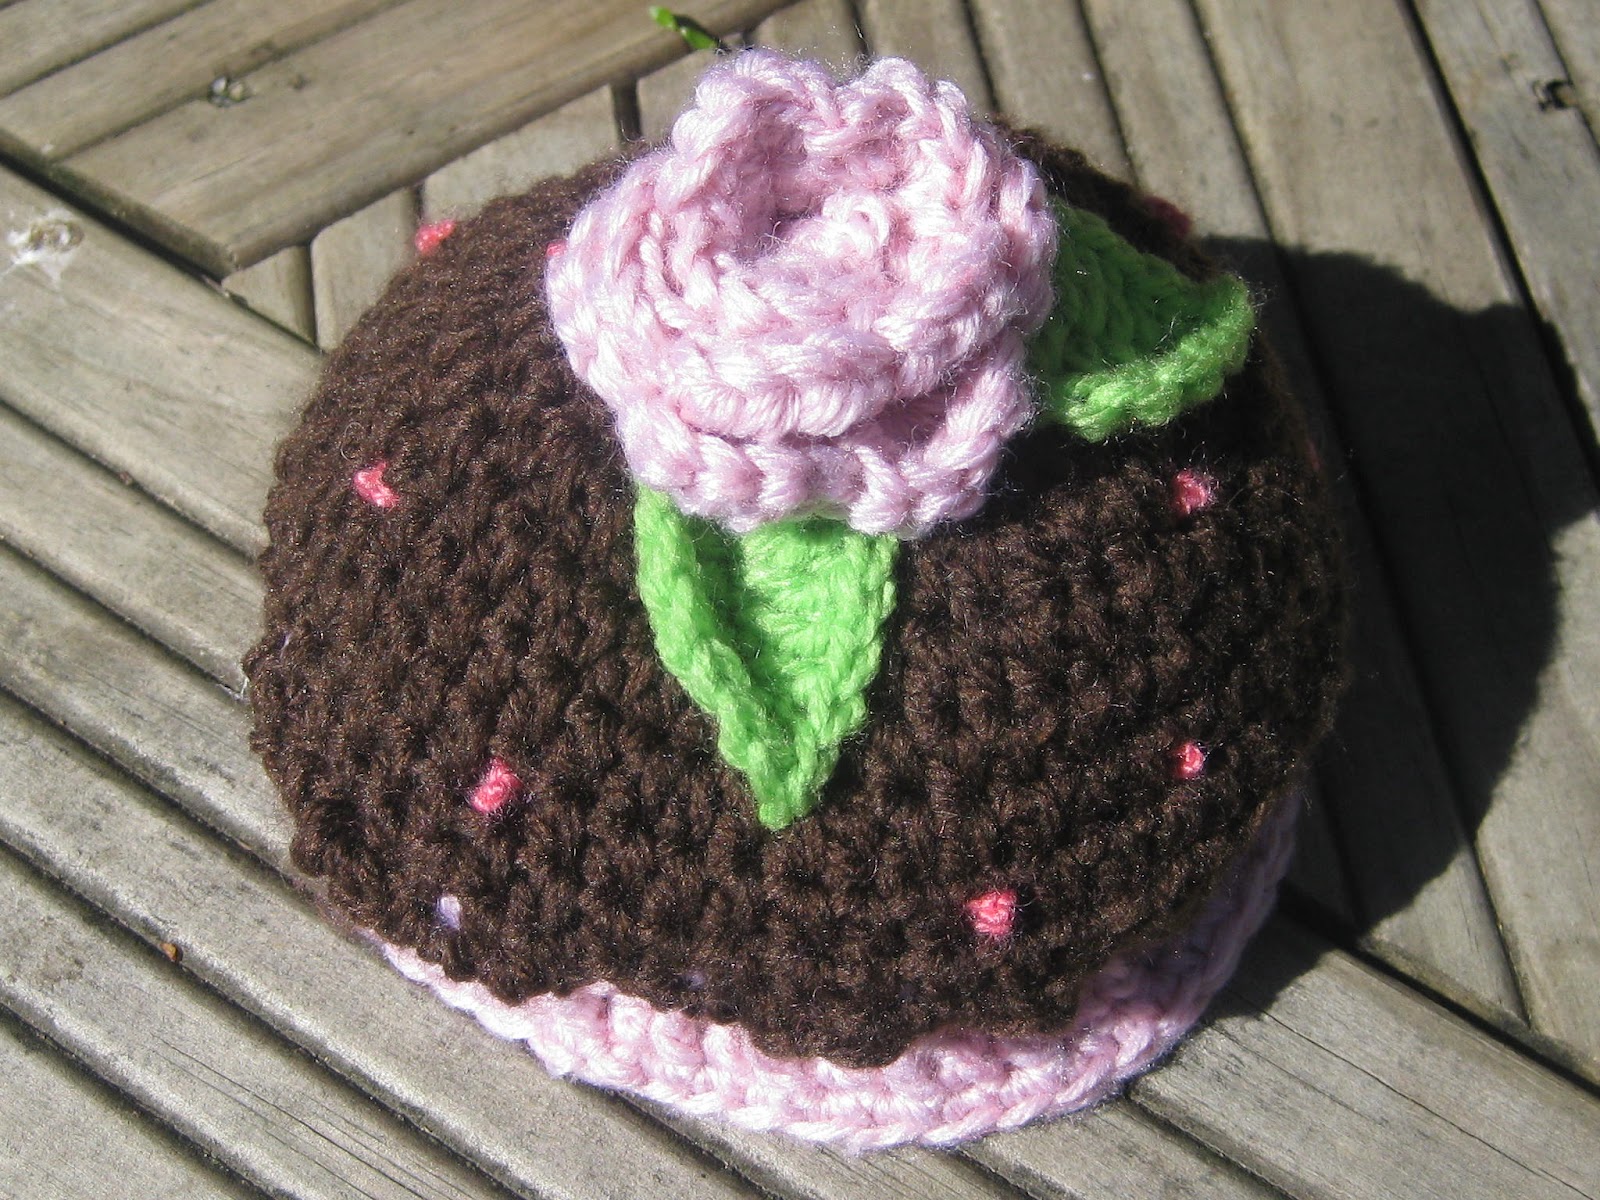
Newborn cupcake hat

Crochet Cupcake Hat

Crochet Cupcake Hat


NOTE: My patterns are free and I would like them to stay that way. You are free to print them out and pass them around but please make sure my blog address is somewhere on the pattern (http://knotyournanascrochet.blogspot.co.nz/) so that people know where the pattern originated. 

Please do not sell my patterns or say they are your own. You are free to do whatever you want with the finished item. If you are selling them online please link back the pattern and give me credit. I took the time to write this pattern out so the least you can do is take the small amount of time it takes to give me credit. 


Supplies

4mm and 3.5mm Hook
50g Dark Brown DK 8 ply
50g Pink DK 8 ply
(you probably won't even need that much)
Small amount of green and darker pink
Measuring tape
Stitch Marker

4mm hook
Do not join rounds, make sure you mark beginning with stitch marker

Round 1: Start with the magic circle (or chain ring), 8 sc into ring,
Round 2: 2 hdc in each stitch around (16)
Round 3: 2 hdc in next stitch, hdc in next stitch around (24)
Round 4: 2 hdc in next stitch, hdc in next 2 stitches. (32)
Round 5: 2 hdc in next stitch, hdc in next 3 stitches. (40)
Round 6: 2 hdc in next stitch, hdc in next 4 stitches. (48)
Round 7-10: hdc around
Round 11: In FLO, *sc, hdc, dc in first stitch, dc, hdc, sc in next stitch, sk1* repeat around. Sl Stitch into gap under last st as this will give you a more pronounced shell. Finish off.

Round 12: Join pink yarn to back loop of round 11, Ch 2, dc around (48) Join in top of ch 2
Tip: I ended up with a gap between my first and last stitch so I did a dc decrease to close the gap.
Round 13-16: Ch 2, *FPDC in next st, dc in next stitch* continue around. Join (48)
Round 17: Ch1, sc around. Finish off. When weaving in the ends I sewed the icing shells to the cupcake bottom so they didn stick out.

Flower and leaves
3.5mm hook

http://attic24.typepad.com/weblog/may-roses.html

I found it easier to sew the leaves onto the bottom of the flower and then sew the flower onto the hat

Sprinkles

Cut small pieces of darker pink yarn. Pull through yarn so you have 2 strand on the right side of the hat.
Crochet Cupcake Hat

Tie as many knots for the size sprinkle you want.

Crochet Cupcake Hat

Pull strands back to wrong side and make a double knot. Cut ends.
Crochet Cupcake Hat


Monday, 17 September 2012

Blooming Crochet Dahlia

Crochet Dahlia


Flower
8 ply yarn (bigger yarn will make a bigger flower)
4.5mm hook
Stitch marker

Round 1: Start with magic circle, 8 sc into circle. (8)

Do not join but work in continuous rounds,

Round 2: Working in BLO, 2sc in each st around. (16)

Round 3: Working in BLO, *2sc in next st, sc in next st* Repeat between * until you reach the beginning of the round (24)

Now making petals,

 Sl st into the next st, ch 6, turn, Sc into the second ch from the hook and next 4 sc, sl st into the back loop of the next st (loop furthest away)

Working in continuous rounds in the loops left from working into the back loops, *ch 6, sc in 2nd ch from hook, 4 sc down ch, sl st into next loop* Repeat until 2nd to last loop. Sl st into last loop and finish off.