This blog contains affiliate links. Please see my disclosure policy for more information.


Showing posts with label accessories. Show all posts

Tuesday, 23 April 2013

10. Great Granny Projects

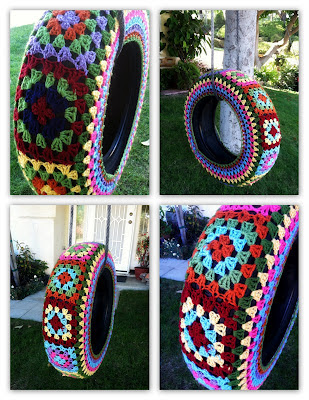
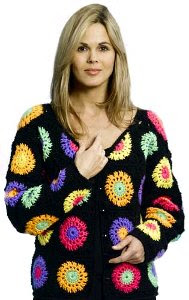
There are so many different things you can create with granny squares and this is just a few of them.


1. Granny Square Slippers


Crochet-Granny-Square-Slippers
http://www.purlbee.com/granny-square-slippers/


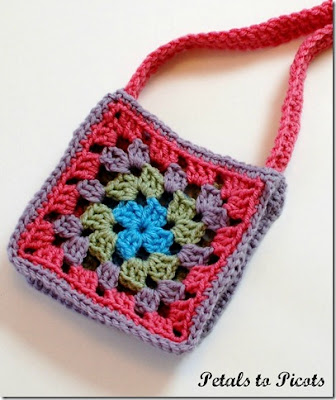
2. Granny Square Bag 


Crochet-Granny-Square-Bag-Bobwilson123
http://www.bobwilson123.org/bags--purses.html

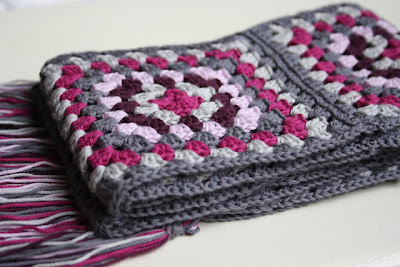
3. Granny Square Scarf

crochet-granny-square-scarf
http://www.talesfromahappyhouse.com/2012/08/a-granny-square-scarf.html

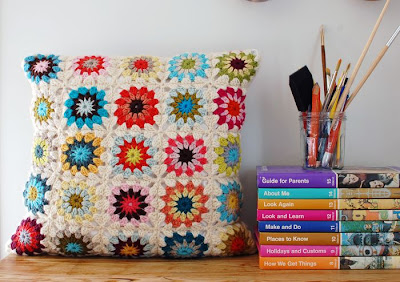
4. Granny Square Pillow

http://blairpeter.typepad.com/weblog/2012/02/a-granny-square-with-a-circle-center-tutorial.html
10. Crochet Draft Stopper

http://madebypatch.wordpress.com/2012/01/25/granny-square-excitement/

Are you still learning to crochet? This class offered by Craftsy and hosted by Vickie Howell will get you on the right track and have you crocheting like a pro in no time. 

Designed to be an introductory course it will guide you through the basic stitches and best of all you will learn to create granny squares and be able to use them in some of the wonderful projects above. Make sure to check it out here Online Crochet Class

Monday, 14 January 2013

Hair Swirls

hair-swirls-crochet

crochet-hair-swirls


I think these are just the cutest things and can't wait until my daughters hair is long enough so she can wear them. The are designed to tie around a pony tail.


Wednesday, 2 January 2013

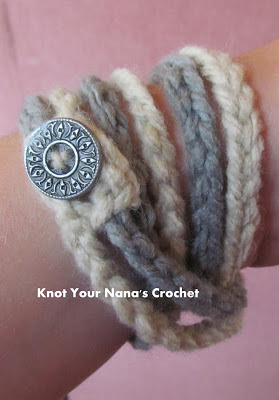
Crochet Chain Bracelet

bracelet-crochet

crochet-chain-bracelet


I love these bracelets and wanted to make some so I decided to share with you how I made mine.

Really you can use any yarn and hook. But I have included the materials I used as a guide. This pattern would be great for someone just learning to crochet and practicing chaining.

Materials:

12 ply, bulky yarn. I used Moda Vera Filo Grande in brown and grey
4.50 mm hook
Scissors
Button
Yarn needle


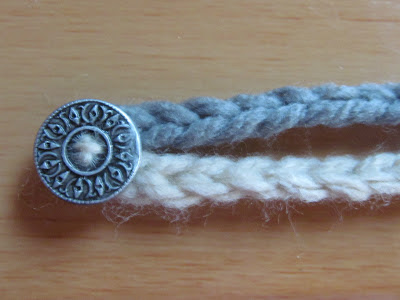
With first colour Ch for a length of 24 inches. Sc in the 7th chain from the hook. This will be your button hole so if you are using a bigger or smaller button ensure this loop will go around it. If you need the loop to be bigger sc further away from the hook. If you need it smaller sc closer to the hook. Finish off.


Join second colour in the stitch shown above. Ch for the same length as the first colour. Join with a sl stitch to the end of the first colour. Finish off. Weave ends into the back of the chains leaving one strand to sew on the button. A statement button would look great on this.

You can also continue to add colours or chains for a fuller look but this one will wrap around the average size wrist three times.

This will also work for a necklace. Just increase the length or you can follow this pattern http://www.lovecityblog.com/2011/04/get-hooked-4-crochet-chain-necklace.html


Monday, 31 December 2012

Camel Stitch Ear Warmer (knit look)

I am so excited. I just found out about the Camel Stitch and really wanted to make something with it. There is already a hat and a cowl so I thought why not give an earwarmer a go? I actually think I am going to do two of them. One will be a button up and one will be a mobius. Did I mention I was excited?

crochet-camel-stitch-ear-warmer

ear-warmer-crochet-camel-stitch

I failed to get a decent photo at the moment, white on white in the sun doesn't show well.

You will need:

10 ply or worsted weight yarn. I don't usually work with this but I found it cheap so I brought it.
5.00 mm crochet hook
Buttons for the button up look (I still need to buy these but have included instructions on how to do button holes)
Yarn needle.

This is a video I found on the Camel Stitch.

http://www.youtube.com/watch?v=9L4WPFhmzDg


For those who can't see videos because you are on the phone the basic idea is to sc not in either of the normal loops but the horizontal bar just below the top loops. We are working flat and you will use the front horizontal bar. You will insert your hook under that bar and then just do a normal sc.

This pattern can be made any side, just crochet your starting chain to the head measurement you are aiming for.

Pattern:

Ch 71 (or the amount to fit around your head. Add 2 inches extra for the button version)

Row 1: Sc in 2nd chain from the hook and across. Ch 2, turn. (70)

Row 2: Sc across in the front horizontal bar as mentioned above. Ch 1, turn. (70)

Repeat row 2 until you reach your desired width. Mine is 19 inches long unstretched and 4 inches wide.

Finishing:

There are 3 ways you can do this.

1. Mobius- Twist headband and slip stitch ends together. Finish off and weave in ends.

2. Just straight. Slip stitch ends together without twisting.

3. Button up at the front or back- ch 1. Working down short side place 2 sc evenly. ch 5. Estimate the 5 stitches. Skip them. 3 sc evenly. Ch 5, estimate another 5 stitches. Skip them. 2 sc in last 2 spaces.

 Ch 1, turn. Sc in each sc, 5 sc in each ch 5 sp. Finish off and weave in ends.

You can attach yarn to other end and sc across that short side if you like a cleaner look but you won't see this when it is closed.

Photo of the button holes


Sunday, 30 December 2012

Bows!

These can be used for a variety of things, embellishing hats, a brooch or what I am doing is putting them on hair clips for my sister. I made her a couple last year to wear to work and she asked for more for her 22nd Birthday. I decided to write the pattern as I made them this time. They are slightly different than the first lot I made and I haven't attached them to clips yet but I will get photos of that when I do it.


Crochet Bows Free Pattern

Crochet Bows Free Pattern

Materials:

4.00 mm crochet hook
DK 8ply yarn

Any hook and yarn will work but that is what I used to get a bow that is 6 inches wide and 3 inches high.

Main part of bow:

Row 1: Ch 21, hdc in 3rd ch from the hook and across. Ch 2, turn. (20 hdc)

Row 2-7: Hdc across. Ch 2, turn. (20)

Do not ch 2 at the end of row 7. Ch 1, sc around putting 3 stitches in each corner to keep it even. Join to first sc with a sl st and finish off.

Weave in ends

Centre of bow:

Row 1: Ch 5, sc in 2nd ch from the hook and across. Ch 1, turn. (4 sc)

Row 2-8: Sc across. Ch 1, turn. (4)

Do not turn at the end of row 8. Ch 1, sc around putting 3 stitches in each corner to keep it even. Join to first sc with a sl st and finish off leaving a long tail for sewing to your item or clip.

I fold the centre of the bow (wrong side together) in half and sew up the side.

These are the two pieces you should now have.

Crochet Bows Free Pattern

Pinch the 3 middle rows together and bring the sides in like the top picture. Wrap the centre of the bow around the main part and stitch the ends together to secure it. Now you have a bow which can be sewed onto anything.

And just because you need to see how far I have actually come in a year. Yes I have only been doing this for  just over a year. I learned via Crafty Minx Crochet School.